You have no items in your shopping cart.
Recent Posts
-
A Comprehensive Guide from Choosing Kits to Displaying Masterpieces
A Comprehensive Guide from Choosing Kits to Displaying Masterpieces
-
15 Amazing Facts About Diamond Painting
15 Amazing Facts About Diamond Painting
-
How to Seal your Diamond Painting [Tutorial]
How to Seal your Diamond Painting [Tutorial]
-
How to Frame Your Diamond Painting [Tutorial]
How to Frame Your Diamond Painting [Tutorial]
More Paintings
More Paintings

Ladybirds and Flower Ladybirds and Flower
From $22.99


22
Aug
Seal the Deal!
Imagine this: you took months picking and sticking the little, joy-providing, sparkling diamonds on the adhesive canvas you have worked so hard to protect from all things atmospheric. Your final product shines and sparkles in the light and you can feel the gorgeous mosaic diamond painting almost smile back at you as the culmination of your hard work and dedication. It is almost magical for a while and you bask in the glory of your completed work until the brute force of gravity defeats you and slowly, your diamonds start falling…. one by one.
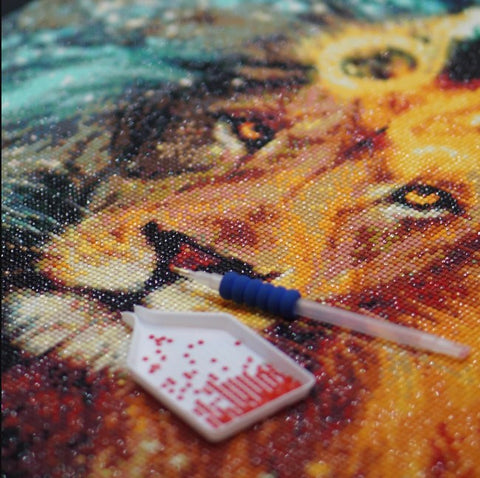
The feeling of exasperation and hopelessness that must accompany one who experiences the phenomenon of gravity destroy their beautiful work of art can be avoided. All you have to do is seal! Sealing is the process of covering your diamond painting with a protective film of a sealant, thus improving the longevity of your finished art and “locking” the diamonds in their place, so they do not fall off. All you need to do to protect your diamond painting is to seal the deal.
The process of sealing is quite easy and straightforward and does not ask for too much labor, however, it works wonders to protect your precious work of art.
To seal a diamond painting, you will have to follow the given steps so you can ensure your work remains safe and protected:
Things you need to seal your diamond painting:
- A sealant (or the protective film that will cover your diamond painting), such as a Sealer Glue or Finish (Gloss Mod Podge, resin or even clear nail polish can be used in case a proper sealant is unavailable). The type of sealant you use depends upon you, but there is one important condition that you must keep in mind: the sealant remains glossy and transparent after completely drying.

- A roller tool to help flatten and fix any loose diamond

- A small paintbrush or a cloth to clean the completed canvas, in case it has dust on it
- A pair of tweezers to pick out stray hair or lint or any other particle

Most of the things mentioned above are usually available even in the household, so there will not be much trouble to find them.
Seal your diamond painting [Step by Step]
The following steps give you clear instructions as to how you must seal your diamond painting:
1. Start by pressing down gently with a roller. This step ensures that all the diamonds are pressed firmly onto the canvas and are not loose.
2. If any diamond is misplaced, you should make sure to fix it back onto the adhesive canvas.
3. Using a pair of tweezers, pick out any stray hair or lint.
4. Gently brush off dust or particles from the canvas using a small paintbrush or a piece of dry cloth.
5. Use a slightly damp cloth to clean off any residual wax or adhesive that covers a diamond. This usually occurs during the process, but you need to clean the residue to make sure the canvas is completely clean.
6. Using a separate, bigger paintbrush, cover the canvas with a layer of your preferred sealant.
7. If the sealant is in a spray bottle, use short bursts of spray to cover the entire painting. This ensures equal coverage.
8. Let the canvas dry completely before setting it up for display.
NOTE: If the diamond painting kit is a partial drill kit, do not cover the high-definition printed image with the sealant. Only use the sealant on portions with the diamonds.
Now that you have completed your diamond painting and protected it with a sealant, it is about time that you frame it so you can show it off to the world.
Seal the Deal!
Imagine this: you took months picking and sticking the little, joy-providing, sparkling diamonds on the adhesive canvas you have worked so hard to protect from all things atmospheric. Your final product shines and sparkles in the light and you can feel the gorgeous mosaic diamond painting almost smile back at you as the culmination of your hard work and dedication. It is almost magical for a while and you bask in the glory of your completed work until the brute force of gravity defeats you and slowly, your diamonds start falling…. one by one.
The feeling of exasperation and hopelessness that must accompany one who experiences the phenomenon of gravity destroy their beautiful work of art can be avoided. All you have to do is seal! Sealing is the process of covering your diamond painting with a protective film of a sealant, thus improving the longevity of your finished art and “locking” the diamonds in their place, so they do not fall off. All you need to do to protect your diamond painting is to seal the deal.
The process of sealing is quite easy and straightforward and does not ask for too much labor, however, it works wonders to protect your precious work of art.
To seal a diamond painting, you will have to follow the given steps so you can ensure your work remains safe and protected:
Things you need to seal your diamond painting:
- A sealant (or the protective film that will cover your diamond painting), such as a Sealer Glue or Finish (Gloss Mod Podge, resin or even clear nail polish can be used in case a proper sealant is unavailable). The type of sealant you use depends upon you, but there is one important condition that you must keep in mind: the sealant remains glossy and transparent after completely drying.
- A roller tool to help flatten and fix any loose diamond
- A small paintbrush or a cloth to clean the completed canvas, in case it has dust on it
- A pair of tweezers to pick out stray hair or lint or any other particle
Most of the things mentioned above are usually available even in the household, so there will not be much trouble to find them.
Seal your diamond painting [Step by Step]
The following steps give you clear instructions as to how you must seal your diamond painting:
1. Start by pressing down gently with a roller. This step ensures that all the diamonds are pressed firmly onto the canvas and are not loose.
2. If any diamond is misplaced, you should make sure to fix it back onto the adhesive canvas.
3. Using a pair of tweezers, pick out any stray hair or lint.
4. Gently brush off dust or particles from the canvas using a small paintbrush or a piece of dry cloth.
5. Use a slightly damp cloth to clean off any residual wax or adhesive that covers a diamond. This usually occurs during the process, but you need to clean the residue to make sure the canvas is completely clean.
6. Using a separate, bigger paintbrush, cover the canvas with a layer of your preferred sealant.
7. If the sealant is in a spray bottle, use short bursts of spray to cover the entire painting. This ensures equal coverage.
8. Let the canvas dry completely before setting it up for display.
NOTE: If the diamond painting kit is a partial drill kit, do not cover the high-definition printed image with the sealant. Only use the sealant on portions with the diamonds.
Now that you have completed your diamond painting and protected it with a sealant, it is about time that you frame it so you can show it off to the world.